Setting Up your Profile on Twitter for Best Results
You’re already on Facebook, and now you’re finally convinced it’s time to join Twitter: However, these two social networks have their own peculiarities and rules, and you should never judge a network by another one.
By default, everything you post on Twitter is public. Think of it as a micro-blog, where you are only allowed 140 characters to say everything in one tweet (post).
Just as with Facebook, you have a Profile Photo. You can set a background on your Profile Page (Twitter offers a few for you to choose from). You can upload a custom background, if you want to use it to help brand your business with your logo, website colors and graphics. In fact, You can do so much more than simply post tweets like this one:

(Though saying “thank you” is always a good idea.)
But plenty of time for exploring later. Let’s go through the basics of setting up a strong Twitter profile…
Step 1. Before You Start
Have your Profile Photo ready, and put serious thought into reason for joining Twitter and your Twitter “handle” (username). Twitter names are always preceded by the “@” sign. Decide which type of handle will work best for your Twitter goals – your name (e.g. “@johnsmith”) your website’s main offering (“@Mousinator”) or what you want to be known for (“@FBtipqueen”).
In your Twitter handle, you are only allowed to use:
- Upper and lower case alphabet characters
- Plain numbers
- Underscores (“ _ “)
Two important tips:
- Do keep your handle as short as possible. The longer it is, the less characters people will have when replying to you, as they have to include your handle in their reply.
- Keep in mind your handle is also a keyword. That’s why you might want to include your best keyword in your handle, if you want to be found that way
Choosing Your Profile Photo – You can rarely go wrong with using an updated headshot, but you may wish to use your logo instead. If you want to brand your company and eventually sell it, use your logo. The Profile Photo size specification is 700k maximum.
It all depends on your goal and objective in using Twitter – but no matter what your main goal, you will want to set up Twitter optimized for growing your traffic!
Adding Contacts – Also consider ahead of time how you are going to add connections you already have. Just like Facebook, Twitter will ask to use your address books and email accounts. You can also add them manually.
So you’ve decided on your objective, handle and profile photo. Time to sign up and set up!
Step 2. Signing Up
Signing up is a really easy process…
1) Go to Twitter’s https://www.twitter.com/ page. Fill in:
- your full name
- the email address you want Twitter notifications to land in
- A strong password, containing Upper and Lower case letters, numbers and at least one special symbol (e.g. “Wsb33*a1”).
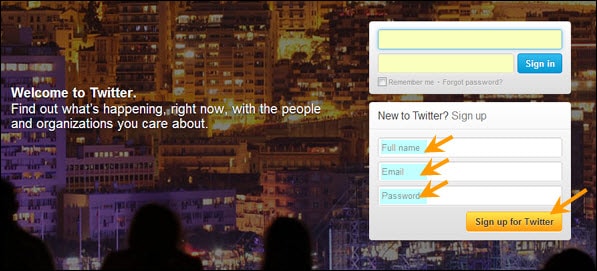
2) As new page will open. Fill in your data.
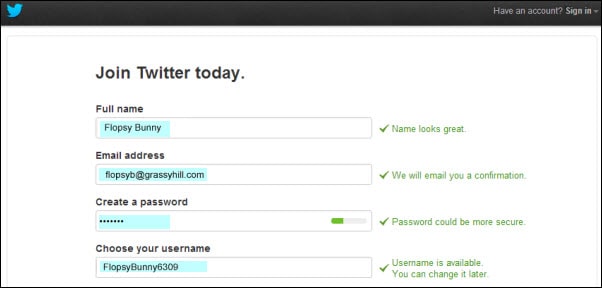
Notice that Twitter will automatically fill in the username choice it thinks best. If your actual name is taken, you will most likely see your name (or an abbreviation of it) and a bunch of numbers.
Remember, keep it short and memorable. Replace this suggestion with a better optimized handle. (Example: “@ FlopsyB” or “@CarrotQueen”, if the latter is your website name; or the name of a book you’ve written; or what you want to be known as.)
3. Scrolling down further, uncheck “Tailor Twitter based on my recent website visits”, if you share your computer with others in the house or office.
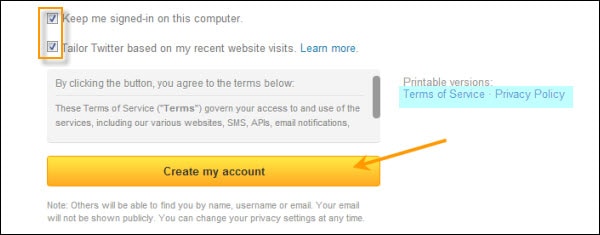
Be sure to save a record of your username and password, as well as read the “Terms of Service” and “Privacy Policy”, before clicking “Create my account”
4. Log in.
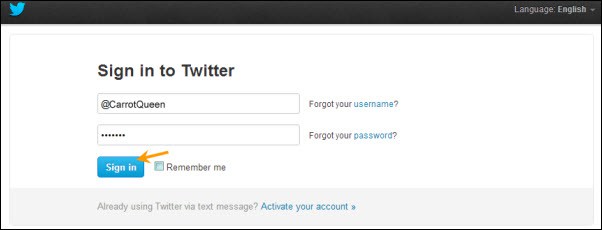
5. You’ll see a welcome message, using your real name. Select “Next”.

6. It will then walk you through a series of set up steps, first suggesting you pick 5 people to follow from a list in a left-hand, vertical widget.
At first, you will see nothing but celebrities. Keep scrolling down, until you begin seeing authority sites and news sites like CNN; or social networks you really want to follow, such as YouTube. (Yes, it has its own Twitter channel!)

As you add more accounts from this list, you’ll notice you’re being served better-tailored results. Twitter is “reading” your choices and adjusting to accommodate your tastes.
Don’t go overboard: Make sure you only choose people who are relevant to your Twitter goal and intended audience. Also, be aware Twitter is actually going to force you to follow five more. (Don’t worry, you can Unfollow them as soon as you’ve finished setting up your profile.)
7. You can also search Suggestions with your keywords.
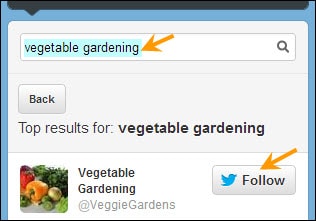
8. Select your compulsory “5 more”, and press “Next”.
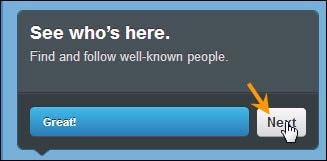
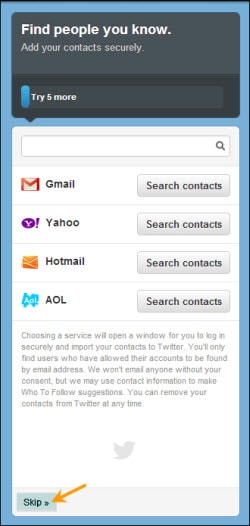
9. Now you’ll be allowed to select email addresses for Twitter to mine. If you don’t wish to enter email contacts at this time, simply press “Skip” in the bottom-left corner of the widget.
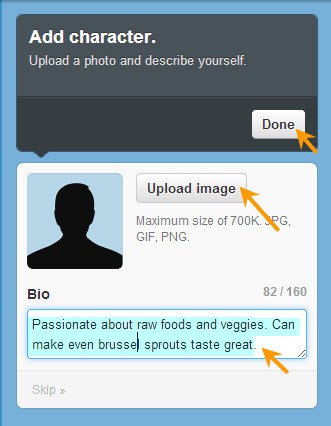
10. Twitter now invites you to “Add Character”. Write your 160 word bio in the textarea box – don’t worry; it will tell you how many characters you are using as your type. Then upload your chosen Profile Photo.
11. At this point, you’ll be told you were sent an email notification. You can either choose to confirm your email now and log in again: Or continue.
You will also get your first glimpse of how your Twitter account and feed looks. If you find one of the accounts you added has completely dominated your feed, Unfollow them.
12. Go to the top-right corner. Click on the little quill pen icon. This will allow you to compose your first tweet.

A textarea box will open up. Type away! Introduce yourself, or ask a question. (Don’t expect too much interaction yet.)
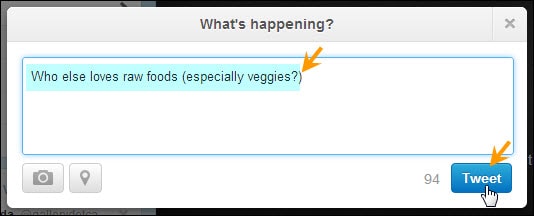
You can also click on “Home”; then enter your tweet in the textarea box in the left-hand vertical widget.
Use the little camera icon to add a photo, and the magnifying glass to add your geographical location.
Tips to Grow Your Traffic
After you have added all the targeted contacts you care to at the moment, spend some time listening to their conversations. Get the feel of these; then add your own tweets on the same topic. When you Follow people on Twitter, many will follow you back. They will see your tweets – especially if you use hashtags they use in your comment. (But only use a hashtag if it’s relevant to what you’re saying.)
A hashtag looks like this: “#hashtag”. It’s used like a keyword, and people will search for ones that interest them.
Notice that this tweet was Retweeted by the Royal Ontario Museum. Start retweeting posts that please you. Thank people when they retweet yours. Reply to comments.
1. To take any of these actions, hover your mouse over the bottom of the tweet to make action links appear. To retweet, click “Retweet”. To reply, click on “Reply”.

Twitter will automatically dump the handle of the person you are replying to into your textarea box. Simply fill in the rest of your tweet.

Mix your posts. Don’t just write your thoughts — tweet:
- Links to great articles you like or blog posts you’ve written
- Photos
- Questions
- Links to polls you’ve created
- Comments about your life your audience can relate to
- Breaking news for your niche or industry
- Tips
In short, anything you think will interest your audience and start a conversation.
Adding the Extras
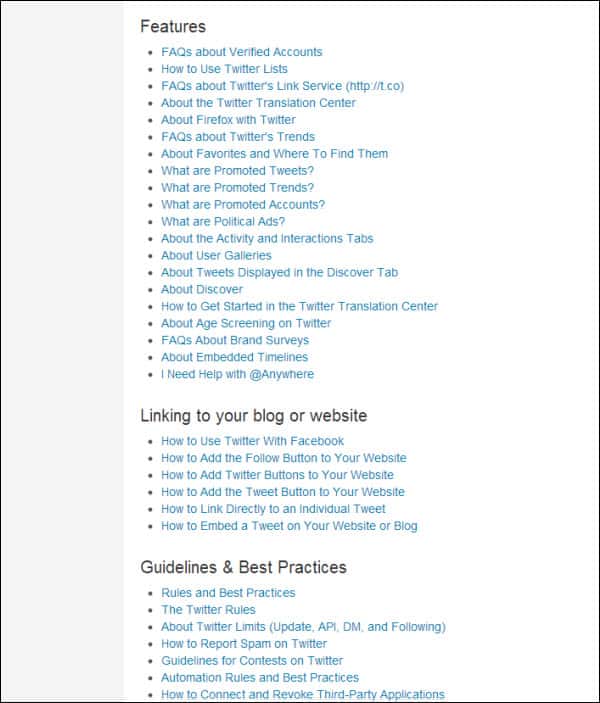
The most important thing is to get your Twitter profile up and running. But don’t just leave it there – study the Help Section and it’s 31 Twitter Basics, to find out strategies, tweaks and techniques to make your Profile even more attractive to your target audience.
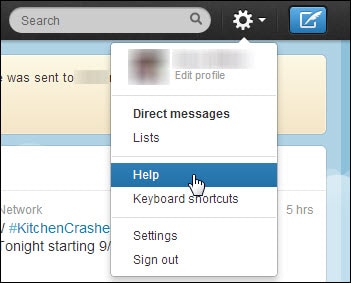
The Help section will allow you to learn all sorts of ways to optimize your Profile and Twitter account even more – including:
- Customizing your page colors and design
- How to be found by your phone number
- Going mobile
And much, much more.
But no matter what you decide to do – or not do – to your Twitter Profile, always keep one thing in mind with every change or tweak.
It should appeal to and align with your target market… while growing you more traffic!
Leave a Reply